In early December, one of my besties and I went to a cooking class held at the Ginger Factory in Yandina on the Sunshine Coast. The class was absolutely brilliant, and we both went away with some new tricks and also, some reassurance that some of the lines our respective others were selling us on food were actually right.
The chef that ran the class is Erik Van Alphen, and he was funny, insightful and deeply passionate about food, which was highly contagious. The fact that he subscribes to my 'don't cook without a glass of wine next to you' philosophy only made me like him more. Especially when he put me in charge of pouring it.
Recently I've been working some big hours at my day job, and Hubby has very much been holding the fort at home. In an effort to thank him for looking after me, and our day to day chores, I decided to crack out one of Erik's recipe's last night. The recipe is a Tagliatelle Carbonara, but I decided to make fettuccine instead (I prefer it).
To make the pasta, I started with 250g of 00 flour. Erik explained in the class that it's very important to use 00 flour if you can get it, because the gluten level is different from plain flour, and lends itself to pasta making, whereas plain flour is better for baking.
I tipped the flour onto my kitchen benchtop, made a well in the middle and poured in two eggs, which I had already whisked up.
Next I slowly worked the flour into the egg, and then kneaded away until all the flour and egg was combined and I had a nice smooth dough. It didn't take as long as I thought it might, and I have to admit, it was quite therapeutic... Then I popped it into a lightly floured container and covered it with a tea towel and left it alone for 20 minutes.
While I was busy kneading, Hubby jumped into the kitchen and finely sliced up a heap of parsley, a couple of cloves of garlic and about 100g of speck. The recipe calls for pancetta or bacon... but we love speck and we had some, so we used it.
Next I whisked up three eggs, added some salt, pepper, 50ml of cream and a heap of grated parmesan. The recipe calls for about half a cup, but I probably used more than that (I love cheese, I just can't help myself).
Next was my favourite bit - actually making the pasta. I cut the dough up into fist-sized pieces, sprinkled it with cornflour and got stuck in.
The pasta maker was a Christmas present from my parents-in-law. They've had it for years and never used it, and lucky me, it's actually made in Italy, rather than some cheap machine I probably would have bought but for their generosity.
So to make my pasta, I fed a piece through the machine on the widest setting, then folded it over and fed it through again, then folded it over and fed it through a third time. After that, I fed it through twice on each setting until I got to setting five. We tried for setting six, but the dough started to look stretched and like it was going to break. Hubby thought it could have done with some more flour to stop it sticking, but we decided to just roll it through the cutting attachment and leave it at that. I have to admit, a second set of hands at this stage is very, very helpful.
A little bit of pasta goes a long way, so at this point I was very glad I had halved the recipe before I started - even this much pasta is too much for two (unless you want to eat til your sick of course). There was something IMMENSELY satisfying about having made this pasta myself.
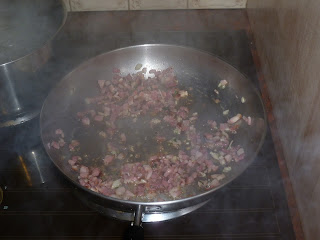
While the water for the pasta came to the boil, I popped the speck and garlic in a pan with some olive oil and fried it off until it was crispy. Yes, that is smoke. No, I didn't set the fire alarm off. Or burn the speck. Or burn myself. Perhaps next time I won't use such a high heat....
Once the water was boiling, Hubby dropped the pasta in for me and we let it bubble away for about five minutes. It would have been quicker with a bigger pot, but you have to use what you've got.
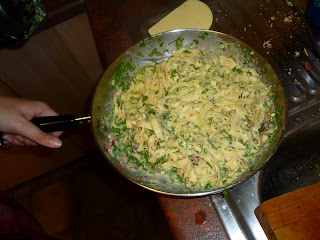
Because I had more cooked pasta than we needed, instead of pouring the sauce into the pot, I transferred the pasta I wanted into my fry pan (which I'd taken off the heat) and stirred the speck through. Then I poured in the egg and parmesan mix and the parsley and stirred like crazy. You need to get everything off the heat because otherwise you'll end up with pasta and cheesy scrambled egg. The pasta is hot enough to cook the egg, and as long as you give it a good stir as you go, no scrambled egg.
In the class, Erik taught me how to make a pasta nest when presenting.... but I didn't get the hang of it then and I haven't got the hang of it yet... but still, with an extra sprinkle of parmesan, salt and pepper over the top, this meal turned out AWESOME.
This is the end result. As a side, Hubby made a salad of lettuce, basil, tomato, bocconcini and sliced up crusty olive bread which was topped off with olive oil and balsamic vinegar. I thought this was rather nice, given it was meant to be a thank you dinner for him and he still ended up in the kitchen somehow...
I love this recipe. I love that it was the result of a class I loved (and will be going to more of). I love that it was so simple. It was easy, tasty and I think you can tinker as much as you like (next time, mushrooms and chicken pieces, I reckon). Nothing beats freshly made pasta, and making it just isn't hard. I maybe wouldn't make it mid-week given time restraints, but it certainly is going to be a regular in our house.


